Do you want to install Google Analytics in WordPress?
You are at the right place.
In order to get success, you need to know how your audience interacts with your site. Check the traffic stats to know your audience is the best way. Google Analytics does the same for free. In this post, I shall share why Google Analytics is important? How can you install Google Analytics in your WordPress site, website or blog (step by step)?
Why is Google Analytics Important for Bloggers?
After starting a blog, your 1st task is to get traffic as well as subscribers. Google Analytics will show you the stats that matters to you the most and help you to make decision.
You can see:
Who visits your website?
This part of analytics shows that what is the geographical location of your audience (country+city), which browser your user is using to visit your site (Mozilla, Chrome) etc. It also includes important information like flash support, JavaScript support, screen resolution, language etc.
The data is extremely useful, and it can be helpful in different ways. When you will get a custom design, you will use the user data to ensure that your site is compatible with your audience or not.
If most of your visitors do not have flash support, then you should not add flash elements in your website. If most of the visitors are using 1280 screen resolutions, then make your design compatible with 1280 resolutions or smaller.
What do people do when they are on your website?
You can track the location of the user on your site. How long he stays on your site, and also what is the bounce rate. Bounce rate is the percent of users exit your site on the 1st visit.
By using this information, you can increase the pageviews and decrease the bounce rate.
When do people visit your website?
By looking at the peak hours in the day for your website, you can choose the right time to publish your post. If the time zone is not compatible with your time zone, you can schedule your post to meet that criteria.
How do people find your website?
This section of the analytics show that what is the source of traffic or where did the user come from? For example, direct links, search engines (Google, Bing), referral links and so on.
Additionally, it also shows the percentage of your visitors from every source. Google Analytics gives you an overview of each of these categories. If you want to know about search engine category, it will show you which search engine gives you more traffic Google, Bing, Yahoo etc.
The referral sources enable you to know which sites you need to work with the most. If your top referral is Facebook, then you need to create exclusive content to attract the audience of Twitter.
If your top referrer is an external website, you may want to build a partnership with that site like guest posting etc.
How do people interact with your content?
Google Analytics also shows that how users interact with the content of your website. It shows the percentage of the user that which link he clicked on your website etc.
You can run A/B split tests by creating content experiments in Google analytics to know what works best to fulfill your goals.
By observing the user interactivity, you can work on your content around your users. By getting the answers to the questions above, you can pay attention to the strategies which work for your website and get rid of those strategies which do not work.
Get rid of guess work and focus on the stats which matter, so you will be able to make data driven decisions.
How to Signup with Google Analytics
Step 1: First of all, you need to create a Google analytics account. To do this, go to Google Analytics Signup Page.
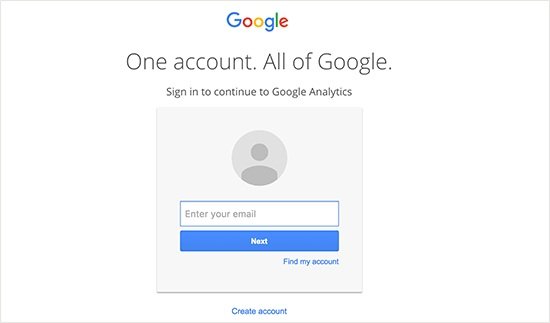
You will see a screen like the one below. If you already have an existing Google or Gmail account, you need to use it to sign in. If you do not have an existing account, then create a new one for yourself.
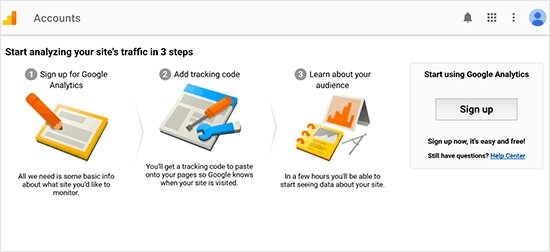
Step 2: After signing in using your Gmail account, you will go to a screen like below. That is where you will sign up your Google analytics using Gmail account.
Step 3: On the next screen, you need to select between a website or mobile app. Make sure you select website.
After doing so, enter account name (it will be your profile name for the website in Google analytics), URL of website, website name, country and time zone.
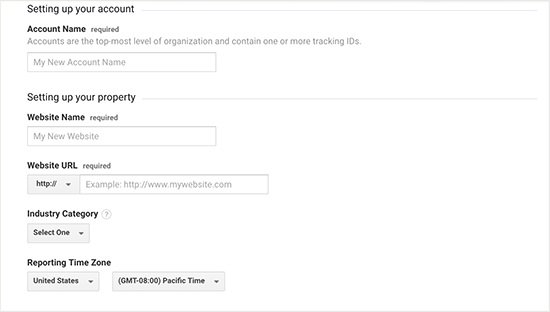
After putting this information, you need to click on get tracking ID button. You will be given Google Analytics terms and service which you must need to agree. Click on I agree button.
Step 4: Now you will be given your Google Analytics tracking code to use. Copy the tracking code because you will need to enter it in your WordPress website. It depends on the method you use below.
![]()
I recommend leaving the analytics browser tab open because you may need to revisit it. After installing the code on your WordPress website.
Now you have setup a Google analytics account. Now let’s see how to install Google analytics in WordPress.
How to Install Google Analytics in WordPress
There are several different ways to setup Google analytics in WordPress site. I shall show you three different methods where the first option will be easiest for you and the last one is the hardest.
You can select the one that is suitable for your needs.
1. Google Analytics for WordPress by MonsterInsights
MonsterInsights is one of the famous Google analytics plugin for WordPress. More than 1 million websites are using it such as Playstation, Zillow, Bloomberg and so on.
It is one of the easiest ways to add Google analytics to WordPress (whether he is a beginner or expert).
MonsterInsights offers both the pro version as well as the free version. In this guide, I shall be using the free version of MonsterInsights.
If you want to use the pro version of MonsterInsights, you can use it. It has more advanced features like ads tracking, ecommerce tracking, author tracking etc. The process of setting it up is the same.
Let’s get started.
First of all, you need to install and activate the MonsterInsights plugin. For more details, see our step by step guide on how to install a WordPress plugin.
After activation, the plugin will add a new menu item named Insights to your admin menu of WordPress. You have to visit Insights>Settings to configure the settings of the plugin.
You will see the screen where you need to click on Authenticate with your Google account. It will connect Google Analytics to your WordPress website.
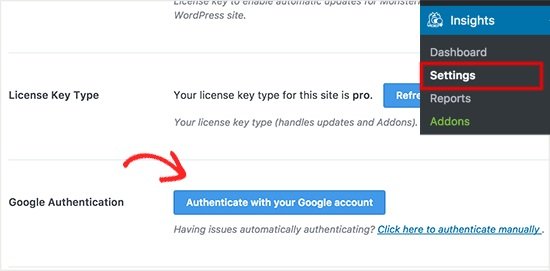
It will redirect you to Google account where you to select the account to log in if you are already sign in.
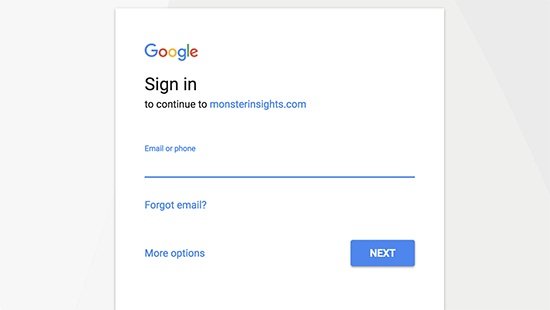
Click on ‘Next’ to continue.
Now Google will ask you to allow MonsterInsights to access your Google analytics account.
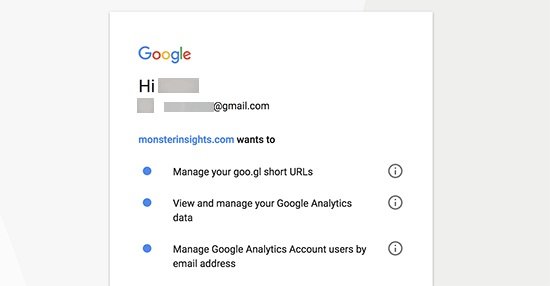
Click on the ‘Allow’ button to continue.
The final step is to choose the profile that you want to track. You have to choose your site and click on complete authentication button to continue.
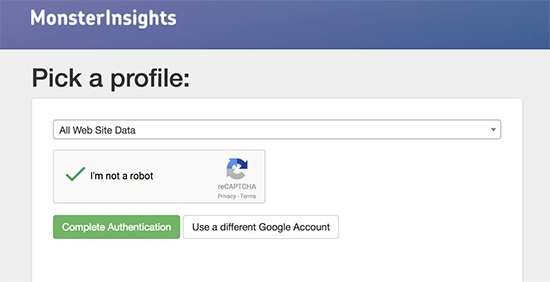
It will redirects you to your WordPress website.
That is it. You have successfully installed and setup Google analytics on your WordPress website.
Remember, it will take sometime to show your stats so have patience.
The best thing about using MonsterInsights is that you can see the report of Google analytics using your WordPress dashboard.
Just visit Insights>Reports page to get an overview of your analytics stats or data.
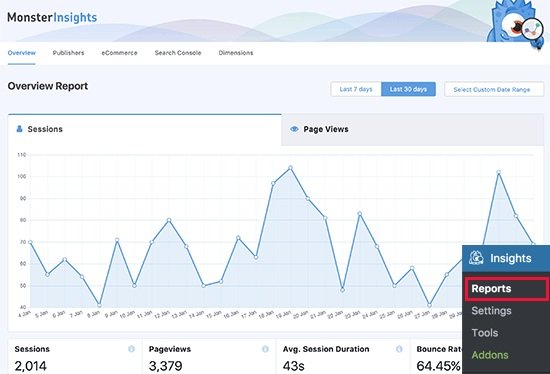
You can visit the tracking tab to customize the tracking settings based on your requirement:
![]()
Note: MonsterInsights is considered to be as Google Analytics for WordPress by Yoast.
2. Insert Headers and Footers Plugin
This method is not as good as MonsterInsights because it will not allow you to do advanced level configuration. In addition, you will also not see Google Analytics data in WordPress dashboard.
First of all, you need to install and activate the Insert Headers and Footers plugin. For more details, see our step by step guide on how to install a WordPress plugin.
After activation, you need to go to Settings > Insert Headers and Footers page.
Now paste the Google Analytics code which you copied in step 4 into the headers section.
![]()
Do not forget to save changes by clicking the button of save changes.
3. Install Google Analytics in WordPress Theme
This method is for advanced users who are aware of code. It is unreliable because the code will vanish when you will switch or update the theme. I do not suggest this method.
Add code in header.php file
Just edit the header.php file in your WordPress theme and paste the code you copied in step 4, after <body> tag.
Do not forget to save your changes and upload the file to your server.
Add via Functions File
You can also add Google Analytics tracking to the file of WordPress functions. It will add the code to every page or post on your WordPress website.
You will have to add this code to your theme’s functions.php file.
|
1
2
3
4
5
6
7
|
<?phpadd_action('wp_head', 'wpb_add_googleanalytics');function wpb_add_googleanalytics() { ?>// Paste your Google Analytics code from Step 4 here<?php } ?> |
Viewing Reports on Google Analytics Website
Google Analytics has the ability to show vast data that is collected from your stats. You can see the data by going through your Google Analytics dashboard and clicking on the reporting tab.
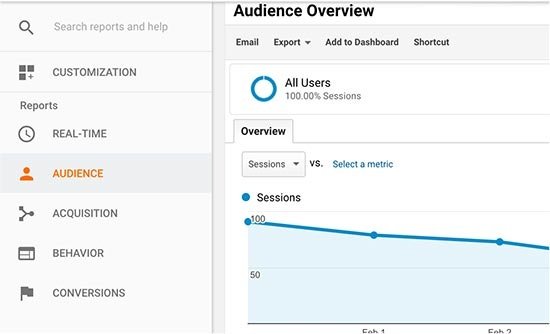
You can see the built-in Google Analytics reports available in the left column. Every section is divided into different tabs and when you click on them it expands and shows you more options.
- Audiencetab will show reports to help you understand your users.
- Acquisitionreports explore where your users came from(location).
- Behaviorreports summarize what your users do after they arrive on your site.
- Conversionreports show how well you are doing against your goals.
I hope that this post will help you to learn how to install Google Analytics on WordPress. You may want to see my post on WordPress Mobile SEO.
Arsalan Rauf is an entrepreneur, freelancer, creative writer, and also a fountainhead of Green Hat Expert. Additionally, he is also an eminent researcher of Blogging, SEO, Internet Marketing, Social Media, premium accounts, codes, links, tips and tricks, etc.